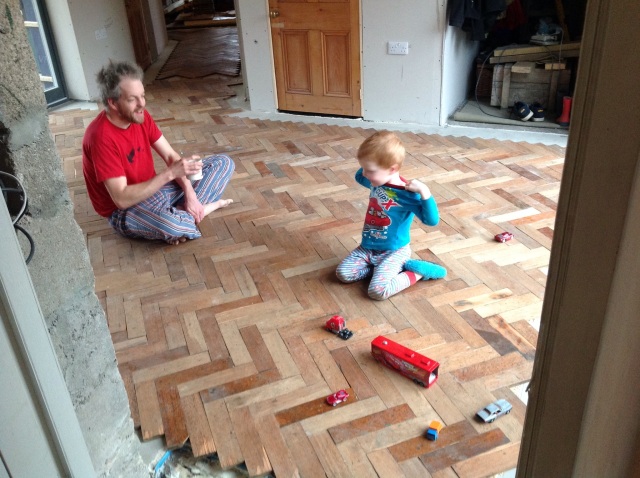
Back to the shower room

Today Thomas’s dad came to help, and the dreadful weather meant indoor work was in order. After clearing out the shower room and washing machine cupboard, a bit of head scratching over the drainage positions, some more trusty self levelling screed was mixed. It seems like no weekend is complete without a batch or two of cempolay deep-fill.

IMG_3026.JPG

IMG_3025.JPG

Posted in Uncategorized | Leave a comment

Planing some larch

Today Nana and Pop were up and a big Planer Thicknesser was hired for the weekend with the view to nicely finishing the larch left over from the exterior cladding so it can be used indoors. Unfortunately about an hour or so in, a belt snapped and the machine was out if order, so instead the edges were planed with the hand planer. Hopefully the rest of the thickness ing can be done another day once the machine is repaired. The painted cladding outside the back door was also finished off.

IMG_3024.JPG

IMG_3022.JPG

IMG_3023.JPG

Posted in Uncategorized | 1 Comment

Porch floor

Yesterday Nana and Pop were up, so the much put-off task of laying the self levelling screed in the porch was undertaken. Although it was only laid to around 10mm thick, so normal stuff would have worked, Cempolay Deep Fill was used as this is tough enough to be left as a finished floor covering. 4 bags were mixed and leftovers were used to finish the triangle cupboard. Pop also dug up some of the concrete puddles left from the building works, and did some more painting on the outside cladding.

IMG_3019.JPG

IMG_3021.JPG

IMG_3020.JPG

Posted in Uncategorized | Leave a comment

Starting the Cast iron guttering

In Sunday Thomas and his dad started fitting the cast iron guttering to the extension. This was all bought brand new but has sat for a couple of years waiting for the rest of the building to be completed. The fixings all worked pretty well, the rubber seals seem to compress nicely, and the lengths of guttering were cut using a large angle grinder and re drilled accordingly.

IMG_2991.JPG

IMG_2990.JPG

IMG_2992.JPG

IMG_2982.JPG

Posted in Uncategorized | Leave a comment

Front of link-room exterior cladding

On Saturday Pop and Thomas tackled the fiddly grey painted cladding around the front door and fixed windows of the link room. This was done in much the same way as the larch cladding on the rest of the extension, but using painted treated softwood rough fencing timber.

IMG_2945.JPG

IMG_2946.JPG

IMG_2943.JPG

IMG_2944-0.JPG

Posted in Uncategorized | Leave a comment

Parquet varnished

After a much needed holiday weekend away, today Bridget varnished the parquet flooring in the link room.

IMG_2923.JPG

IMG_2924.JPG

IMG_2914.JPG

Posted in Uncategorized | 1 Comment

Epic Parquet Planing and Sanding

This weekend was largely dedicated to getting the link room floor done. After the blocks were laid the top level of each varies slightly making for an uneven unpleasant and splintery floor. So firstly Thomas spent all day Saturday with his trusty Bosch electric planer skimming the high points off in a very non methodical but fairly effective system. Next up he and his dad spent all day today with a pair of cheap belt sanders and a lot of 40grit belts removing the varnish and planer marks and generally aiming for a nice smooth surface. Finally while his dad hoovered, Thomas ran over the floor with 80grit on an orbital sander to remove the rough scratch marks left by the belt sanders. Next up is lots of cleaning and hoovering before the varnish is applied.

IMG_2908.JPG

IMG_2905.JPG

IMG_2904.JPG

IMG_2911.JPG

IMG_2910.JPG

IMG_2909.JPG

Posted in Uncategorized | Leave a comment

Laying the link room flooring

Last night Thomas and Bridget had another late one, getting carried away with the rather satisfying task of laying the central body of the parquet flooring. This was laid in the typical herringbone pattern, with the triple block border marked out and left without MS Polymer adhesive. Once dry, this morning, Thomas and his dad then cut off the over hanging blocks (sawing along the same lines with the circular saw, just deep enough to score the self level screed). Finally the edge blocks were laid, starting with the corners.

IMG_2884.JPG

IMG_2885.JPG

IMG_2881.JPG

IMG_2887.JPG

IMG_2890.JPG

IMG_2892.JPG

IMG_2895.JPG

IMG_2896.JPG

Posted in Uncategorized | 1 Comment

Link Room self-levelling screed

Last night, after the children and dog were safely in bed, Thomas and Bridget mixed and poured 11 bags of self-levelling screed to smooth and level the surface of the link room floor in preparation for the parquet. The SBR primer did a great job of stopping the moisture from being sucked out of the freshly poured mix, keeping it workable and free-flowing.

IMG_2878.JPG

IMG_2879.JPG

IMG_2880.JPG

Posted in Uncategorized | Leave a comment

Preparation for flooring the link room

The last few weeks have been mainly devoted to getting everything in place for flooring the link room. More of the same reclaimed pitch-pine parquet is to be used and pretty much the same system as was used in the bedroom is planned, but on a much larger scale. This time, prior to self levelling screed application, Thomas has primed the cement surface with SBR, which should stop it from sucking the moisture out of the self levelling compound. Bridget continues to sand the edges on the blocks then bring them into the room to acclimatise for a fortnight before laying.

IMG_2875.JPG

IMG_2877.JPG

IMG_2867.JPG

IMG_2868.JPG

Posted in Uncategorized | 1 Comment